rhce9认证题目
提高高频操作效率小tips:
1 安装和配置 Ansible
在控制节点 control 上安装和配置 Ansible:
- 安装所需的软件包
- 创建静态清单文件
/home/greg/ansible/inventory,满足以下要求:
- node1 属于 dev 主机组
- node2 属于 test 主机组
- node3 和 node4 属于 prod 主机组
- node5 属于 balancers 主机组
- prod 组是 webservers 主机组的成员
- 创建配置文件
/home/greg/ansible/ansible.cfg,满足以下要求:
- 主机清单文件为
/home/greg/ansible/inventory- playbook 使用的角色位置包括
/home/greg/ansible/roles- 自定义 collection 目录在
/home/greg/ansible/mycollection
-
考试正式开始,使用greg用户连接到control节点,安装ansible
1
2
ssh greg@control
yum install ansible ansible-navigator -y
-
在家目录下创建一个ansible目录,考试的所有操作在本文件夹中进行,即/home/greg/ansible,顺便创建题目需要的roles文件夹和mycollection文件夹
1
2
3
mkdir ansible
mkdir /home/greg/ansible/roles
mkdir  /home/greg/ansible/mycollection
-
创建inventory文件
1
2
3
4
5
6
7
8
9
10
11
[dev]
node1
[test]
node2
[prod]
node3
node4
[balancers]
node5
[webservers:children]
prod
-
使用ansible-init初始化配置文件
1
ansible-config init --disabled > ansible.cfg
-
修改我们需要的配置
1
2
3
4
5
6
inventory=/home/greg/ansible/inventory # 配置主机文件路径
collections_path=/home/greg/ansible/mycollection:/usr/share/ansible/collections # 配置collection路径
roles_path=/home/greg/ansible/roles:/usr/share/ansible/roles:/etc/ansible/roles # 配置roles路径
host_key_checking=False # 跳过证书检查
remote_user=greg # 指定执行ansible命令的用户
become=True # 有些命令例如yum需要提权
-
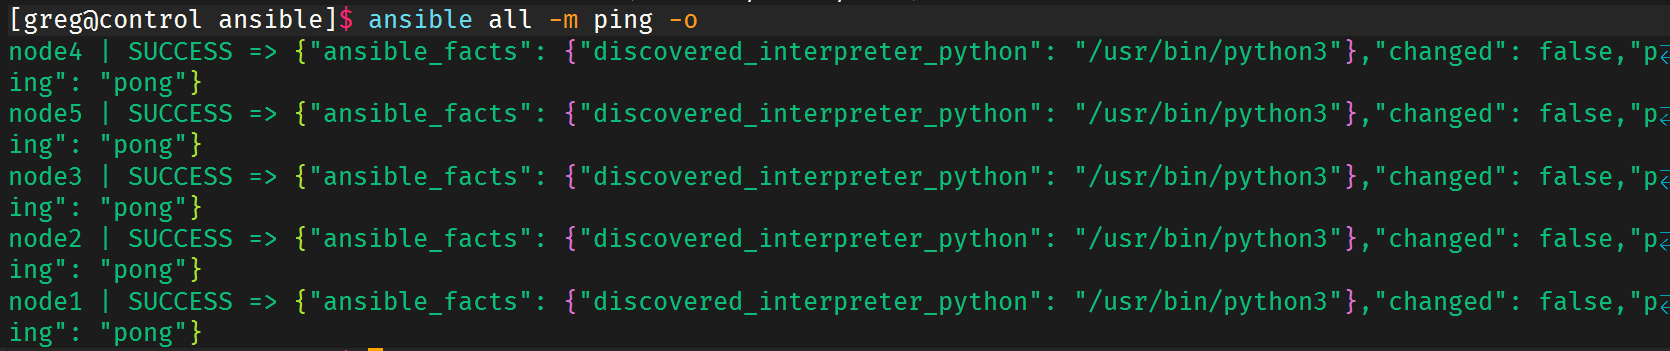
验证
1
2
ansible-inventory --graph
ansible all -m ping
2 配置系统使用默认存储库
创建 playbook
/home/greg/ansible/yum_repo.yml,在各受管节点上安装 yum 存储库:
- 存储库1:
- 名称:EX294_BASE
- 描述:EX294 base software
- 基础 URL:
http://content/rhel9.0/x86_64/dvd/BaseOS- GPG 签名检查:启用
- GPG 密钥 URL:
http://content/rhel9.0/x86_64/dvd/RPM-GPG-KEY-redhat-release- 存储库状态:启用
- 存储库2:
- 名称:EX294_STREAM
- 描述:EX294 stream software
- 基础 URL:
http://content/rhel9.0/x86_64/dvd/AppStream- GPG 签名检查:启用
- GPG 密钥 URL:
http://content/rhel9.0/x86_64/dvd/RPM-GPG-KEY-redhat-release- 存储库状态:启用
-
查询文档
1
2
3
4
5
6
# 添加存储库
- name: Add repository
  ansible.builtin.yum_repository:
    name: epel
    description: EPEL YUM repo
    baseurl: https://download.fedoraproject.org/pub/epel/$releasever/$basearch/
-
配置文件
1
2
3
4
5
6
7
8
9
10
11
12
13
14
15
16
17
18
19
20
---
- name: yum_repository
  hosts: all
  tasks:
    - name: Add repository1
      ansible.builtin.yum_repository:
        name: EX294_BASE
        description: EX294 base software
        baseurl: http://content/rhel9.0/x86_64/dvd/BaseOS
        gpgcheck: yes
        gpgkey: http://content/rhel9.0/x86_64/dvd/RPM-GPG-KEY-redhat-release
        enabled: yes
    - name: Add repository2
      ansible.builtin.yum_repository:
        name: EX294_STREAM
        description: EX294 stream software
        baseurl: http://content/rhel9.0/x86_64/dvd/AppStream
        gpgcheck: yes
        gpgkey: http://content/rhel9.0/x86_64/dvd/RPM-GPG-KEY-redhat-release
        enabled: yes
3 安装软件包
创建 playbook
/home/greg/ansible/packages.yml:
- 将 php 和 mariadb 软件包安装到 dev、test 和 prod 主机组中的主机
- 将 RPM Development Tools 软件包组安装到 dev 主机组中的主机
- 将 dev 主机组中主机上的所有软件包更新为最新版本
-
查询文档
1
2
3
4
5
6
7
8
9
10
11
12
13
14
15
16
17
18
19
20
# 安装一组软件包示例
- name: Install a list of packages with a list variable
  ansible.builtin.yum:
    name: "{{ packages }}"
  vars:
    packages:
    - httpd
    - httpd-tools

# 安装软件包示例
- name: Install the 'Development tools' package group
  ansible.builtin.yum:
    name: "@Development tools"
    state: present

# 更新所有软件包
- name: Upgrade all packages
  ansible.builtin.yum:
    name: '*'
    state: latest
-
配置文件
1
2
3
4
5
6
7
8
9
10
11
12
13
14
15
16
17
18
19
20
21
22
23
---
- name: packages_1
  hosts: dev,test,prod
  tasks:
    - name: Install a list of packages with a list variable
      ansible.builtin.yum:
        name: "{{ packages }}"
      vars:
        packages:
          - php
          - mariadb

- name: packages_2
  hosts: dev
  tasks:
    - name: Install the 'RPM Development Tools' package group
      ansible.builtin.yum:
        name: "@RPM Development Tools"
        state: present
    - name: Upgrade all packages
      ansible.builtin.yum:
        name: '*'
        state: latest
4 使用 RHEL 系统角色
安装 RHEL 系统角色软件包,并创建 playbook
/home/greg/ansible/selinux.yml:
- 在所有受管节点上运行
- 使用 selinux 角色
- 配置被管理节点的 SELinux 为 enforcing 模式
-
安装系统角色
1
2
yum search role
yum install rhel-system-roles -y
-
使用角色
1 2
cp /usr/share/doc/rhel-system-roles/selinux/example-selinux-playbook.yml /home/greg/ansible/selinux.yml ansible-playbook selinux.yml -
验证

5 配置 collection
将以下 3 个collection安装到
/home/greg/ansible/mycollection目录中:
http://classroom/materials/redhat-insights-1.0.7.tar.gzhttp://classroom/materials/community-general-5.5.0.tar.gzhttp://classroom/materials/redhat-rhel_system_roles-1.19.3.tar.gz
-
创建配置
1
2
3
4
5
---
collections:
  - name: http://classroom/materials/redhat-insights-1.0.7.tar.gz
  - name: http://classroom/materials/community-general-5.5.0.tar.gz
  - name: http://classroom/materials/redhat-rhel_system_roles-1.19.3.tar.gz
-
安装角色
1
 ansible-galaxy collection install -r requirements.yml -p /home/greg/ansible/mycollection/
-
验证

6 使用 Ansible Galaxy 安装角色
使用 Ansible Galaxy 和文件
/home/greg/ansible/roles/requirements.yml,从以下 URL 下载角色并安装到/home/greg/ansible/roles:
http://classroom/materials/haproxy.tar(角色名:balancer)http://classroom/materials/phpinfo.tar(角色名:phpinfo)
-
创建配置
1
2
3
4
5
---
- src: http://classroom/materials/haproxy.tar
  name: balancer
- src: http://classroom/materials/phpinfo.tar
  name: phpinfo
-
安装角色
1
ansible-galaxy install -r /home/greg/ansible/roles/requirements.yml -p /home/greg/ansible/roles
-
验证
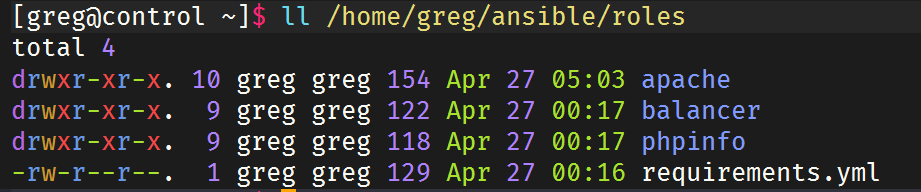
7 创建和使用角色
在
/home/greg/ansible/roles中创建名为 apache 的角色,要求:
安装并启用 httpd 服务
启用防火墙并允许访问 Web 服务器
使用模板文件
index.html.j2创建/var/www/html/index.html,内容为:
(HOSTNAME 为完全限定域名,IPADDRESS 为 IP 地址)
创建 playbook
/home/greg/ansible/apache.yml:
- 在 webservers 主机组中的主机上运行并使用 apache 角色
-
初始化一个角色
1
ansible-galaxy role init apache --init-path /home/greg/ansible/roles/ -
查询文档
1
2
3
4
5
6
7
8
9
10
11
12
13
14
15
16
17
18
19
20
21
22
23
24
25
26
27
28
29
30
31
32
33
# 安装httpd | doc yum 10
- name: Install the latest version of Apache
  ansible.builtin.yum:
    name: httpd
    state: latest

# 确保httpd启动 | doc systemd 10 | 注意要添加enabled: yes
- name: Make sure a service unit is running
  ansible.builtin.systemd:
    state: started
    name: httpd

# 确保防⽕墙启动 | doc systemd 10 | 注意要添加enabled: yes
- name: Make sure a service unit is running
  ansible.builtin.systemd:
    state: started
    name: httpd

# 添加防火墙规则 | 注意添加immediate: yes
- name: permit traffic in default zone for https service
  ansible.posix.firewalld:
    service: https
    permanent: yes
    state: enabled

# 模板文件
- name: Template a file to /etc/file.conf
  ansible.builtin.template:
    src: /mytemplates/foo.j2
    dest: /etc/file.conf
    owner: bin
    group: wheel
    mode: '0644'
-
创建index.html.j2文件
1
Welcome to {{ ansible_nodename }} on {{ ansible_default_ipv4.address }}
-
编辑角色文件
1
2
3
4
5
6
7
8
9
10
11
12
13
14
15
16
17
18
19
20
21
22
23
24
25
26
27
28
29
30
---
- name: Install the latest version of Apache
  ansible.builtin.yum:
    name: httpd
    state: present

- name: Make sure a service unit is running
  ansible.builtin.systemd:
    name: httpd
    state: started
    enabled: yes

- name: Make sure a service unit is running
  ansible.builtin.systemd:
    state: started
    name: firewalld
    enabled: yes

- name: permit traffic in default zone for https service
  ansible.posix.firewalld:
    service: http
    permanent: yes
    state: enabled
    immediate: yes

- name: Template a file
  ansible.builtin.template:
    src: index.html.j2
    dest: /var/www/html/index.html
    setype: httpd_sys_content_t
-
创建配置文件
1 2 3 4 5
--- - name: apache hosts: webservers roles: - apache -
验证

8 从 Ansible Galaxy 使用角色
创建 playbook
/home/greg/ansible/roles.yml:
- 在 balancers 主机组中的主机上运行并使用 balancer 角色,配置负载均衡服务
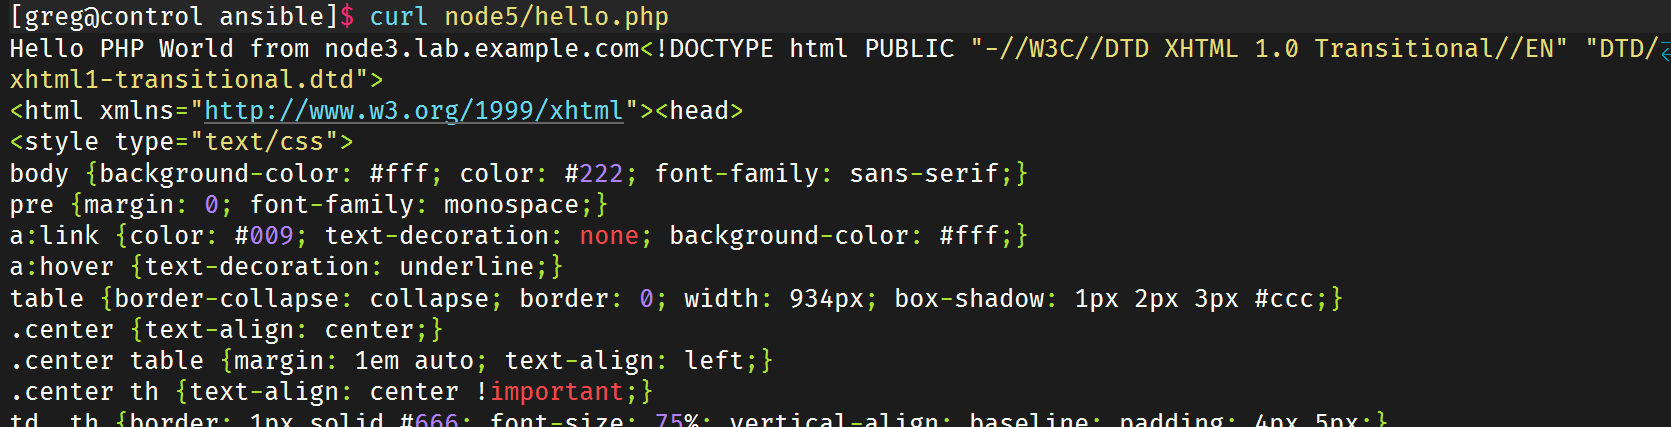
- 在 webservers 主机组中的主机上运行并使用 phpinfo 角色,确保:
- 访问
/hello.php输出Hello PHP World from FQDN- 显示 PHP 配置信息
-
配置文件
1 2 3 4 5 6 7 8 9
--- - name: roles1 hosts: balancers roles: - balancer - name: roles2 hosts: webservers roles: - phpinfo -
验证

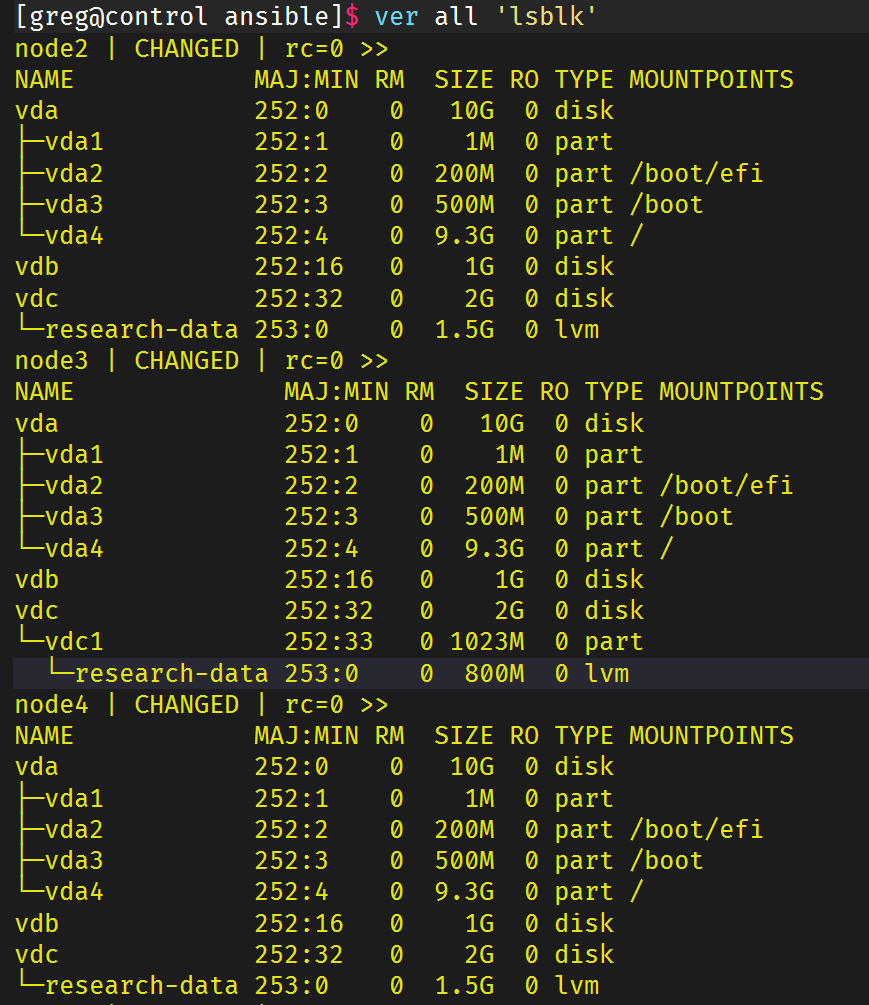
9 创建和使用逻辑卷
创建 playbook
/home/greg/ansible/lv.yml,在所有受管节点上执行以下任务:
- 在 research 卷组中创建名为 data、大小为 1500 MiB 的逻辑卷
- 使用 ext4 文件系统格式化逻辑卷
- 若无法创建 1500 MiB,则显示错误并改为创建 800 MiB
- 若卷组 research 不存在,显示错误信息
- 不挂载逻辑卷
-
查看文档
1
2
3
4
5
6
7
8
9
10
11
12
13
# 创建逻辑卷
- name: Create a logical volume of 512m
  community.general.lvol:
    vg: firefly
    lv: test
    size: 512

# 格式化文件系统
- name: Create a ext4 filesystem on /dev/sdb1 and check disk blocks
  community.general.filesystem:
    fstype: ext4
    dev: /dev/sdb1
    opts: -cc
-
配置文件
1
2
3
4
5
6
7
8
9
10
11
12
13
14
15
16
17
18
19
20
21
22
23
24
25
26
27
28
29
30
31
32
33
---
- name: lv
  hosts: all
  tasks:
    - name: Check if vg exist
      block:
        - name: Create a logical volume of 1500MiB
          community.general.lvol:
            vg: research
            lv: data
            size: 1500m
        - name: Create a ext4 filesystem
          community.general.filesystem:
            fstype: ext4
            dev: /dev/research/data
      rescue:
        - name: Message
          ansible.builtin.debug:
            msg: Could not create logical volume of that size
        - name: Create a logical volume of 800MiB
          community.general.lvol:
            vg: research
            lv: data
            size: 800m
        - name: Create a ext4 filesystem
          community.general.filesystem:
            fstype: ext4
            dev: /dev/research/data
      when: ansible_facts.lvm.vgs.research is defined
    - name: Message
      ansible.builtin.debug:
        msg: Volume group done not exist
      when: ansible_facts.lvm.vgs.research is not defined
-
验证
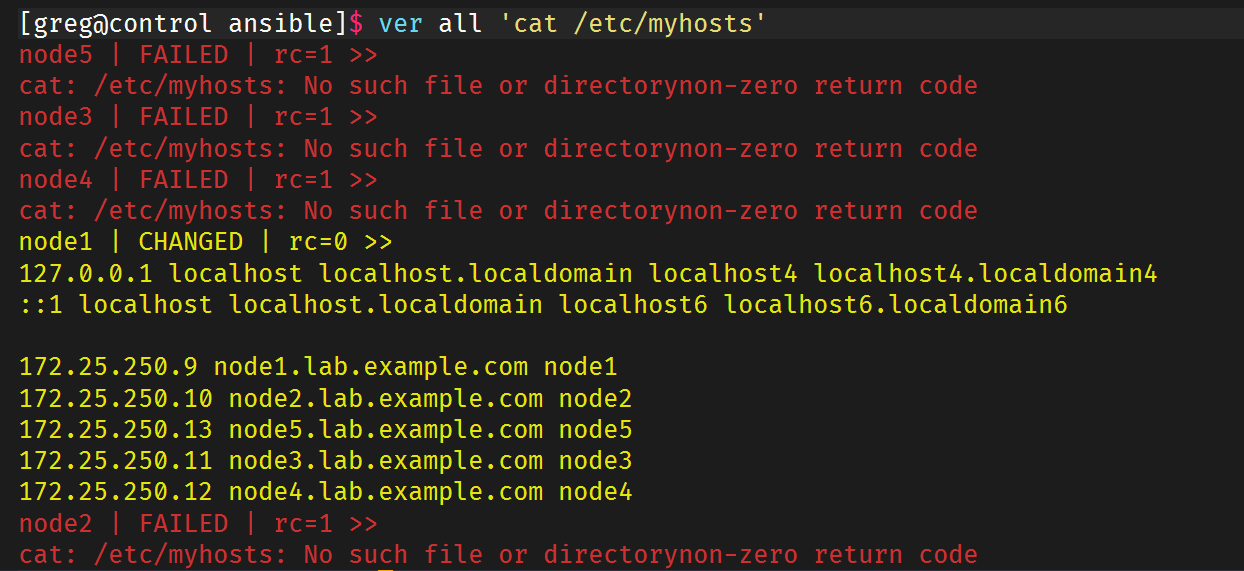
10 生成主机文件
- 从
http://classroom/materials/hosts.j2下载模板到/home/greg/ansible- 修改模板,使其能为每个清单主机生成一行
/etc/hosts格式的内容- 从
http://classroom/materials/hosts.yml下载 playbook 到/home/greg/ansible,使用模板在 dev 主机组中的主机上生成文件/etc/myhosts
-
下载文件
1
wget http://classroom/materials/hosts.j2
-
查找文档
1
2
3
4
5
6
7
8
# 模板文件
- name: Template a file to /etc/file.conf
  ansible.builtin.template:
    src: /mytemplates/foo.j2
    dest: /etc/file.conf
    owner: bin
    group: wheel
    mode: '0644'
-
模板文件
1
2
3
{% for i in groups.all %}
{{ hostvars[i].ansible_facts.default_ipv4.address }} {{ hostvars[i].ansible_facts.nodename }} {{ hostvars[i].ansible_facts.hostname }}
{% endfor %}
-
配置文件
1
2
3
4
5
6
7
8
9
---
- name: hosts
  hosts: all
  tasks:
    - name: Template a file
      ansible.builtin.template:
        src: /home/greg/ansible/hosts.j2
        dest: /etc/myhosts
      when: inventory_hostname in groups.dev
-
验证
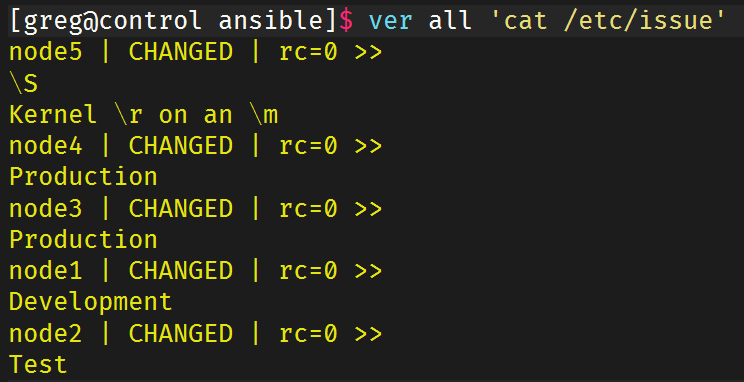
11 修改文件内容
创建 playbook
/home/greg/ansible/issue.yml,在所有清单主机上运行:
- 将
/etc/issue内容替换为:
- dev 主机组:
Development- test 主机组:
Test- prod 主机组:
Production
-
查看文档
1
2
3
4
5
# 使用一行作为文件内容
- name: Copy using inline content
  ansible.builtin.copy:
    content: '# This file was moved to /etc/other.conf'
    dest: /etc/mine.conf
-
配置文件
1
2
3
4
5
6
7
8
9
10
11
12
13
14
15
16
17
18
19
20
21
---
- name: issue
  hosts: all
  tasks:
    - name: Copy using inline content
      ansible.builtin.copy:
        content: 'Development'
        dest: /etc/issue
      when: inventory_hostname in groups.dev

    - name: Copy using inline content
      ansible.builtin.copy:
        content: 'Test'
        dest: /etc/issue
      when: inventory_hostname in groups.test

    - name: Copy using inline content
      ansible.builtin.copy:
        content: 'Production'
        dest: /etc/issue
      when: inventory_hostname in groups.prod
-
验证
12 创建 Web 内容目录
创建 playbook
/home/greg/ansible/webcontent.yml,在 dev 主机组中的主机上:
- 创建目录
/webdev:
- 所有者为 webdev 组
- 权限:
rwxrwsr-x- 设置组 ID
- 创建符号链接
/var/www/html/webdev指向/webdev- 创建文件
/webdev/index.html,内容为Development
-
查看文档
1
2
3
4
5
6
7
8
9
10
11
12
13
14
15
16
17
18
19
20
21
# 创建文件夹
- name: Create a directory if it does not exist
  ansible.builtin.file:
    path: /etc/some_directory
    state: directory
    mode: '0755'

# 创建符号链接
- name: Create a symbolic link
  ansible.builtin.file:
    src: /file/to/link/to
    dest: /path/to/symlink
    owner: foo
    group: foo
    state: link

# 使用一行作为文件内容
- name: Copy using inline content
  ansible.builtin.copy:
    content: '# This file was moved to /etc/other.conf'
    dest: /etc/mine.conf
-
配置文件
1 2 3 4 5 6 7 8 9 10 11 12 13 14 15 16 17 18 19 20 21 22 23 24
--- - name: webcontent hosts: dev roles: - apache tasks: - name: Create a directory if it does not exist ansible.builtin.file: path: /webdev state: directory group: webdev mode: '2775' - name: Create a symbolic link ansible.builtin.file: src: /webdev dest: /var/www/html/webdev state: link - name: Copy using inline content ansible.builtin.copy: content: 'Development' dest: /webdev/index.html setype: httpd_sys_content_t -
验证

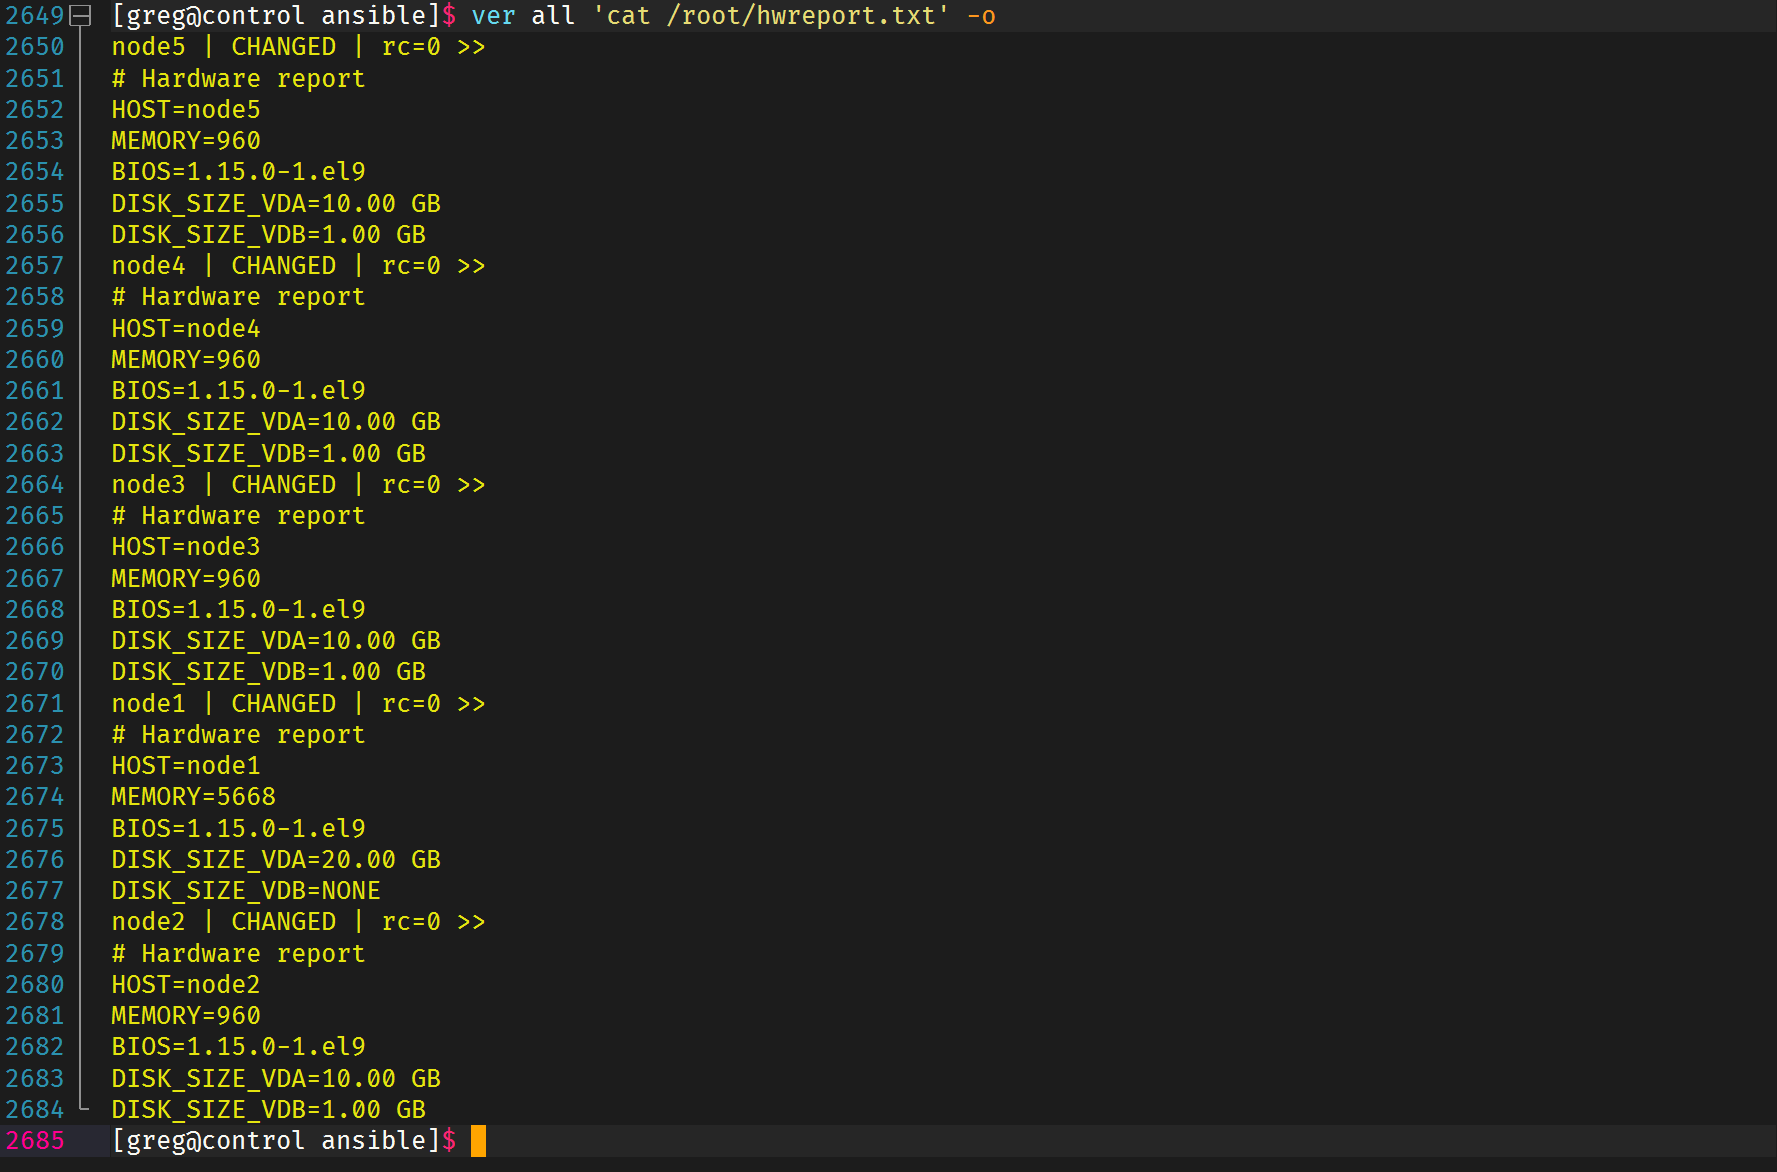
13 生成硬件报告
创建 playbook
/home/greg/ansible/hwreport.yml,在所有受管节点上生成/root/hwreport.txt,包含:
- 清单主机名称
- 总内存大小(MB)
- BIOS 版本
- 磁盘设备 vda 和 vdb 的大小
- 每行格式为
key=value- 若硬件不存在,值为
NONE- 从
http://classroom/materials/hwreport.empty下载初始模板
-
查询文档
1
2
3
4
5
6
7
8
9
10
11
12
13
# 下载文件
- name: Download foo.conf
  ansible.builtin.get_url:
    url: http://example.com/path/file.conf
    dest: /etc/foo.conf
    mode: '0440'

# 编辑某行
- name: Ensure SELinux is set to enforcing mode
  ansible.builtin.lineinfile:
    path: /etc/selinux/config
    regexp: '^SELINUX='
    line: SELINUX=enforcing
-
配置文件
1
2
3
4
5
6
7
8
9
10
11
12
13
14
15
16
17
18
19
20
21
22
23
24
25
26
27
28
29
30
31
32
33
34
35
36
37
38
---
- name: hwreport
  hosts: all
  tasks:
    - name: Download hwreport.empty
      ansible.builtin.get_url:
        url: http://classroom/materials/hwreport.empty
        dest: /root/hwreport.txt

    - name: Replace
      ansible.builtin.lineinfile:
        path: /root/hwreport.txt
        regexp: '^HOST='
        line: HOST={{ ansible_hostname }}

    - name: Replace
      ansible.builtin.lineinfile:
        path: /root/hwreport.txt
        regexp: '^MEMORY='
        line: MEMORY={{ ansible_memtotal_mb }}

    - name: Replace
      ansible.builtin.lineinfile:
        path: /root/hwreport.txt
        regexp: '^BIOS='
        line: BIOS={{ ansible_bios_version }}

    - name: Replace
      ansible.builtin.lineinfile:
        path: /root/hwreport.txt
        regexp: '^DISK_SIZE_VDA='
        line: DISK_SIZE_VDA={{ ansible_devices.vda.size }}

    - name: Replace
      ansible.builtin.lineinfile:
        path: /root/hwreport.txt
        regexp: '^DISK_SIZE_VDB'
        line: DISK_SIZE_VDB={{ ansible_devices.vdb.size | default('NONE',True) }}
-
验证
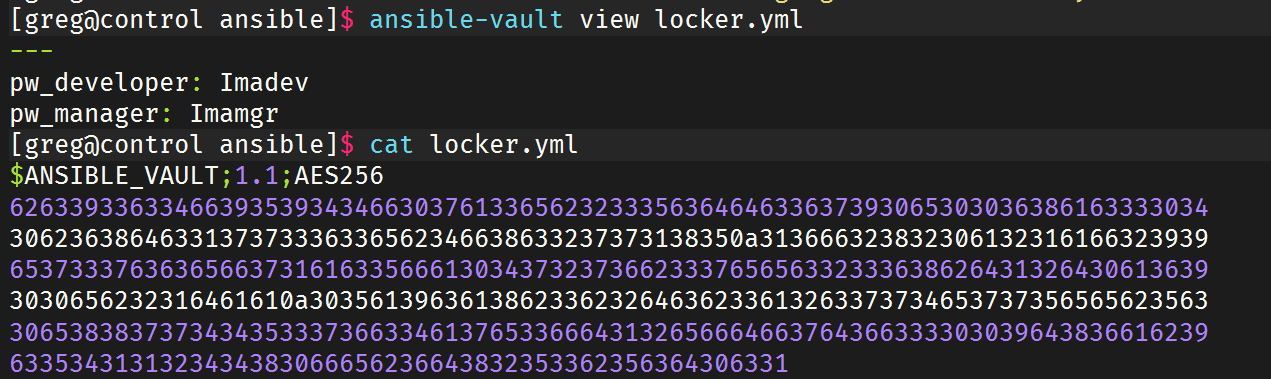
14 创建密码库
创建 Ansible 库
/home/greg/ansible/locker.yml:
- 变量:
pw_developer:Imadevpw_manager:Imamgr- 加密密码:
whenyouwishuponastar- 密码存储在
/home/greg/ansible/secret.txt
-
创建密码文件
1
echo "whenyouwishuponastar" > /home/greg/ansible/secret.txt
-
修改配置文件
1
vault_password_file=/home/greg/ansible/secret.txt -
创建密码文件
1
ansible-vault create /home/greg/ansible/locker.yml
-
验证
15 创建用户账户
从
http://classroom/materials/user_list.yml下载用户列表,创建 playbook/home/greg/ansible/users.yml:
- developer 用户:
- 在 dev 和 test 主机组中创建
- 密码来自
pw_developer变量- 密码有效期 30 天
- 属于 devops 组
- manager 用户:
- 在 prod 主机组中创建
- 密码来自
pw_manager变量- 密码有效期 30 天
- 属于 opsmgr 组
- 使用密码库
/home/greg/ansible/locker.yml和密码文件/home/greg/ansible/secret.txt
-
下载用户列表文件
1
wget http://classroom/materials/user_list.yml
-
查看文档
1
2
3
4
5
6
7
8
9
10
11
12
13
# 用户组存在
- name: Ensure group "somegroup" exists
  ansible.builtin.group:
    name: somegroup
    state: present

# 添加用户
- name: Add the user 'johnd' with a specific uid and a primary group of 'admin'
  ansible.builtin.user:
    name: johnd
    comment: John Doe
    uid: 1040
    group: admin
-
配置文件
1
2
3
4
5
6
7
8
9
10
11
12
13
14
15
16
17
18
19
20
21
22
23
24
25
26
27
28
29
30
31
32
33
34
35
36
37
38
---
- name: users1
  hosts: dev,test
  vars_files:
    - /home/greg/ansible/user_list.yml
    - /home/greg/ansible/locker.yml
  tasks:
    - name: Ensure group "devops" exists
      ansible.builtin.group:
        name: devops
        state: present
    - name: Add the user
      ansible.builtin.user:
        name: "{{ item.name }}"
        password: "{{ pw_developer | password_hash('sha512') }}"
        password_expire_max: 30
        group: devops
      loop: "{{ users }}"
      when: item.job == "developer"

- name: users2
  hosts: prod
  vars_files:
    - /home/greg/ansible/user_list.yml
    - /home/greg/ansible/locker.yml
  tasks:
    - name: Ensure group "opsmgr" exists
      ansible.builtin.group:
        name: opsmgr
        state: present
    - name: Add the user
      ansible.builtin.user:
        name: "{{ item.name }}"
        password: "{{ pw_manager | password_hash('sha512') }}"
        password_expire_max: 30
        group: opsmgr
      loop: "{{ users }}"
      when: item.job == "manager"
-
验证
16 更新 Ansible 库的密钥
更新现有 Ansible 库
/home/greg/ansible/salaries.yml:
- 从
http://classroom/materials/salaries.yml下载- 当前密码:
insecure8sure- 新密码:
bbs2you9527- 保持加密状态
-
下载密码文件
1
wget http://classroom/materials/salaries.yml
-
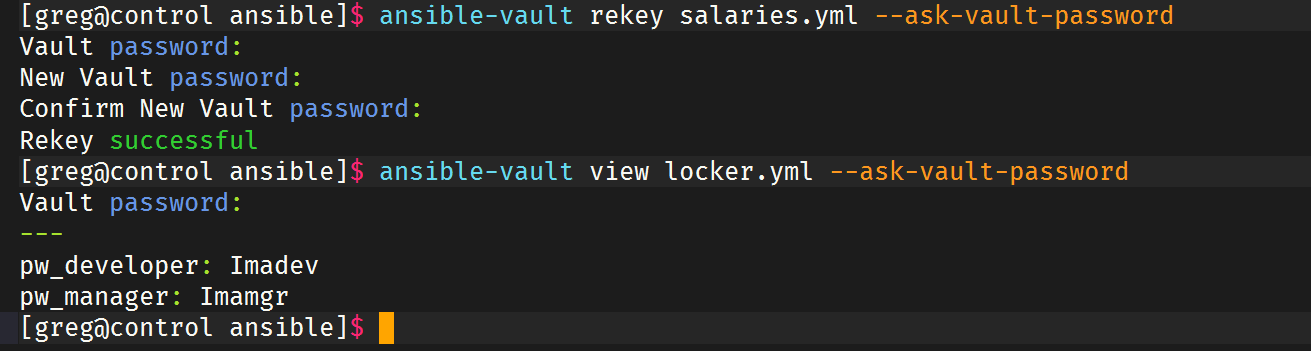
修改密钥
1
2
3
4
5
[greg@control ansible]$ ansible-vault rekey salaries.yml --ask-vault-password
Vault password:
New Vault password:
Confirm New Vault password:
Rekey successful
-
验证
17 配置 cron 作业
创建 playbook
/home/greg/ansible/cron.yml,在 test 主机组中的主机上:
- 配置 cron 作业,每 2 分钟以用户 natasha 身份运行:
logger "EX200 in progress"
-
查询文档
1
2
3
4
5
6
7
# cron模块
- name: Ensure a job that runs at 2 and 5 exists. Creates an entry like "0 5,2 * * ls -alh > /dev/null"
  ansible.builtin.cron:
    name: "check dirs"
    minute: "0"
    hour: "5,2"
    job: "ls -alh > /dev/null"
-
配置文件
1
2
3
4
5
6
7
8
9
10
---
- name: cron
  hosts: test
  tasks:
    - name: Ensure a job
      ansible.builtin.cron:
        name: "logger"
        minute: "*/2"
        job: 'logger "EX200 in progress"'
        user: natasha
-
验证

18 使用 TimeSync RHEL 系统角色
安装 RHEL 系统角色软件包,创建 playbook
/home/greg/ansible/timesync.yml:
- 在所有受管节点上运行
- 使用 timesync 角色
- 配置时间服务器为
classroom.lab.example.com
-
配置文件
1
2
3
4
5
6
7
8
9
---
- name: Create NTP
  hosts: all
  vars:
    timesync_ntp_servers:
      - hostanme: classroom.lab.example.com
        iburst: yes
  roles:
    - rhel-system-roles.timesync
-
验证
19 创建分区
在 balancers 主机上:
- 划分
/dev/vdb1(1500 MiB,若不足则 800 MiB)- 格式化为 ext4
- 挂载到
/newpart1- 若无
/dev/vdb,报错
-
查询文档
1
2
3
4
5
6
7
8
9
10
11
12
13
14
15
16
17
18
19
20
21
22
23
24
25
26
27
28
29
30
# 创建文件夹
- name: Create a directory if it does not exist
  ansible.builtin.file:
    path: /etc/some_directory
    state: directory
    mode: '0755'

# 创建分区
- name: Create a new primary partition with a size of 1GiB
  community.general.parted:
    device: /dev/sdb
    number: 1
    state: present
    part_end: 1GiB

# 格式化文件系统
- name: Create a ext4 filesystem on /dev/sdb1 and check disk blocks
  community.general.filesystem:
    fstype: ext4
    dev: /dev/sdb1
    opts: -cc

# 挂载文件
- name: Mount an NFS volume
  ansible.posix.mount:
    src: 192.168.1.100:/nfs/ssd/shared_data
    path: /mnt/shared_data
    opts: rw,sync,hard,intr
    state: mounted
    fstype: nfs
-
配置文件
1
2
3
4
5
6
7
8
9
10
11
12
13
14
15
16
17
18
19
20
21
22
23
24
25
26
27
28
29
30
31
32
33
34
35
36
37
38
39
40
41
42
43
44
45
46
47
48
49
50
51
52
53
54
55
56
57
58
59
---
- name: partition
  hosts: dev
  tasks:
    - name: Create a directory
      ansible.builtin.file:
        name: /newpart
        state: directory

    - block:
        - name: Create 1500M partition
          community.general.parted:
            device: /dev/vdb
            number: 1
            state: present
            part_end: 1500MiB

        - name: Create ext4 filesystem
          community.general.filesystem:
            fstype: ext4
            dev: /dev/vdb1

        - name: Mount partition
          ansible.posix.mount:
            path: /newpart
            src: /dev/vdb1
            fstype: ext4
            state: mounted

      rescue:
        - debug:
            msg: "Could not create 1500M partition, falling back to 800M"

        - name: Create 800M partition
          community.general.parted:
            device: /dev/vdb
            number: 1
            state: present
            part_end: 800MiB
          when: ansible_facts.devices.vdb is defined

        - name: Create ext4 filesystem (800M)
          community.general.filesystem:
            fstype: ext4
            dev: /dev/vdb1
          when: ansible_facts.devices.vdb is defined

        - name: Mount partition (800M)
          ansible.posix.mount:
            path: /newpart
            src: /dev/vdb1
            fstype: ext4
            state: mounted
          when: ansible_facts.devices.vdb is defined

      always:
        - debug:
            msg: "Disk /dev/vdb does not exist"
          when: ansible_facts.devices.vdb is undefined